Your RV roof is always exposed to harsh environmental conditions making it prone to damages. Part of preventive maintenance is resealing and recoating it to avoid leaks. So, how often should you do it? That's what we asked our RV experts, and here's what they said.
Resealing and recoating your RV roof should be done yearly. This preventive maintenance procedure will help you ensure that all openings are sealed off and the roof has enough protection from harmful external conditions.
Keep reading so we can tell you more about the schedule of your RV roof maintenance. We'll also give you tips and recommendations on sealing your roof and the best products to use. Let's also discuss how long an RV roof that's made of rubber is expected to last.
![Woman is doing the maintenance of a camper trailer, How Often To Reseal And Recoat An RV Roof [And How To Do It]](https://vehq.com/wp-content/uploads/2021/12/How-Often-To-Reseal-And-Recoat-An-RV-Roof-And-How-To-Do-It-e1639923999979-683x1024.png)
When to reseal and recoat your RV roof
RV roofs are doomed to take the brunt of extreme weather conditions and harmful UV rays. These can take their toll on the roof which can cause damages to its coating and sealants.
When the protective coating and binders are damaged, they can lead to leaks in your RV. In turn, this will cause molds and mildew to build up and weaken the walls and surfaces where they form.
Leaks can also make the interior of your camper wet all the time making your stay very uncomfortable. They can also harm your RV appliances. The list of parts for repair or replacement just goes on. In other words, having leaks on the roof is very expensive and mighty uncomfortable too.
That's why it is recommended that you conduct routine maintenance of your rig's roof to do away with these inconveniences. Resealing your RV roof should be done once a year. This will ensure that all gaps and openings are properly shut and will keep moisture, water, and air away.
What is the best way to seal an RV roof?
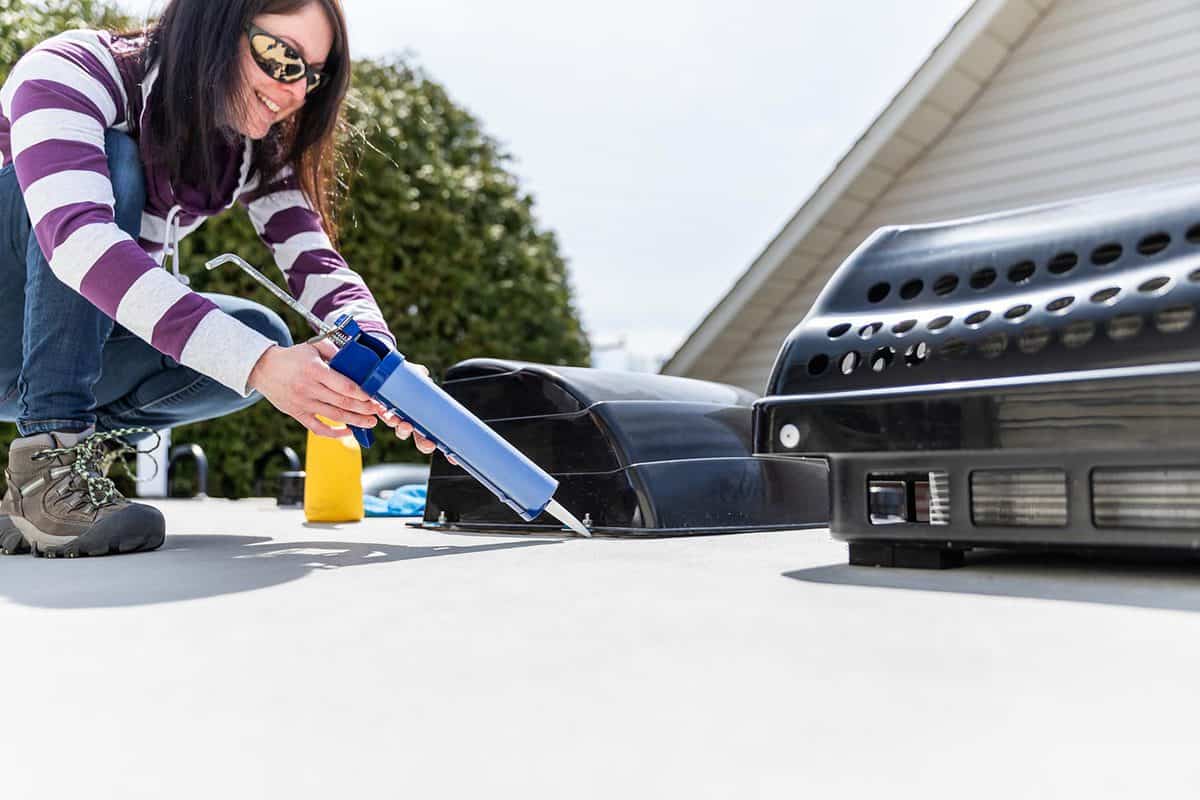
There is an efficient and effective way to seal your RV roof to ensure that all the gaps are covered. First, you need to clean your roof and give it a proper wash. The presence of dirt and debris can make the whole process ineffective because the sealant won't stick to the surface properly.
When the roof is already clean, you can do a more thorough inspection of the surface. In particular, look around the RV vents, skylights, and fans on the roof. These have been installed on the openings on the roof and you want to ensure that those openings are completely shut.
Inspect the seams where the roof meets the body of your camper. Look for portions that seem to be breaking up. You can use a plastic scraper to poke on the sealants used to check on their elasticity. They should be pliant when you apply pressure on them but should also go back to their original state right after.
When you've identified areas that need to be resealed, you need to scrape off the old sealant. It's also recommended to apply denatured alcohol to ensure that the surface is really clean before you apply the new sealant. Follow the instructions indicated in the packaging for best results.
How do you clean an RV roof before sealing?
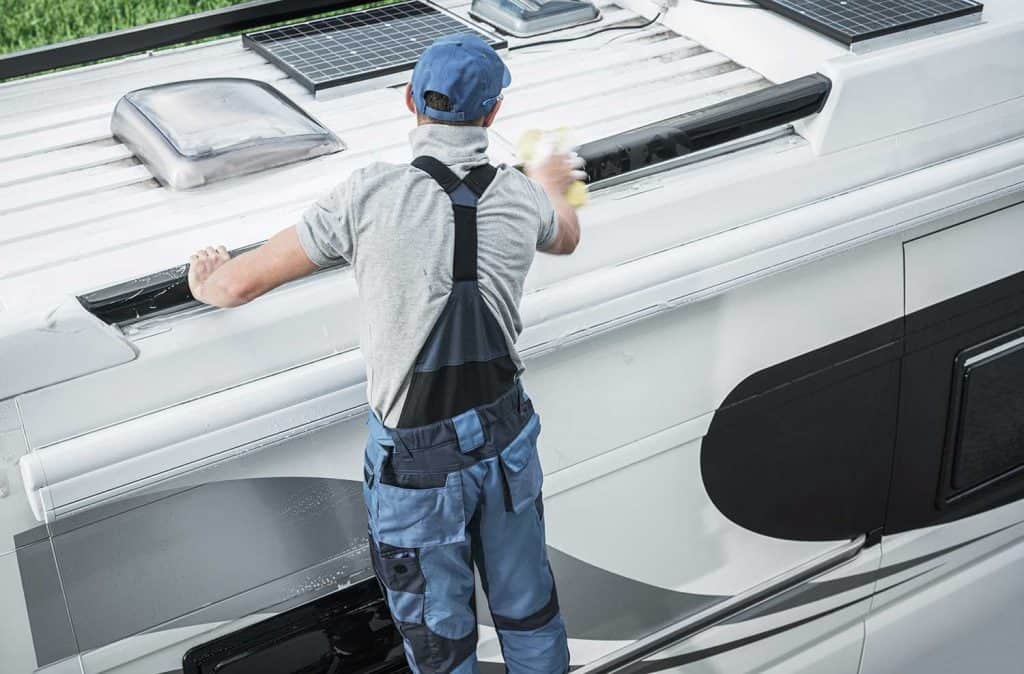
Before you apply a sealant or coating on your RV roof, it is important that you prepare its surface by cleaning it thoroughly. This will make the coating more effective in doing its job. Otherwise, the products you use might not adhere to the roof and won't work properly.
Here are the steps to cleaning your RV roof:
- Give the roof a good wash using a hose and clean water. This will help you get rid of loose debris and dirt.
- Mix a mild cleaner with warm water.
- Get a soft to medium bristled brush to scrub the entire surface of the roof using soapy water.
- Rinse off the soap completely.
- Give it time to air dry.
Be careful when cleaning your roof. It can get really slippery when wet. Check also the recommended cleaning products for your roofing material. Cleaning is the key to the successful application of your RV roof seal and coating.
What do you seal a RV roof with?
Cracks and gaps on your RV roof can ruin your vacation. Instead of relaxing inside your camper, you will find yourself moping and wiping the walls and floors while trying to save your valuables from getting damaged from the downpour.
The good thing is that there are readily available products that you can use to help you close the gaps in no time. Make sure you always have your trusted RV roof sealant on hand.
Aside from sealing the gaps, these products will help you protect the structural integrity of your camper, reduce the rate of wear and tear, and help regulate the temperature inside your RV. They will also help you save on repair and energy costs.
You may choose between two types of RV roof sealants: liquid or tape.
Liquid Sealants
Liquid sealants are very much like paint. You need to clean the surface of the roof prior to application. Once applied, they also require adequate time for curing to prevent cracks.

Check out this liquid sealant on Amazon.
Tape or Adhesive Sealants
Adhesive sealants have been applied on sealing tapes to make them effective in closing the gaps. They do not need prior surface preparation and can be applied directly to the affected area.

Click this link to find this sealing tape on Amazon.
Look for an RV sealant with the best formulation suitable to use for your roofing material. Ease of application should also be your main consideration since you want to solve the leaking problem immediately.
Can you use flex seal on RV roof?
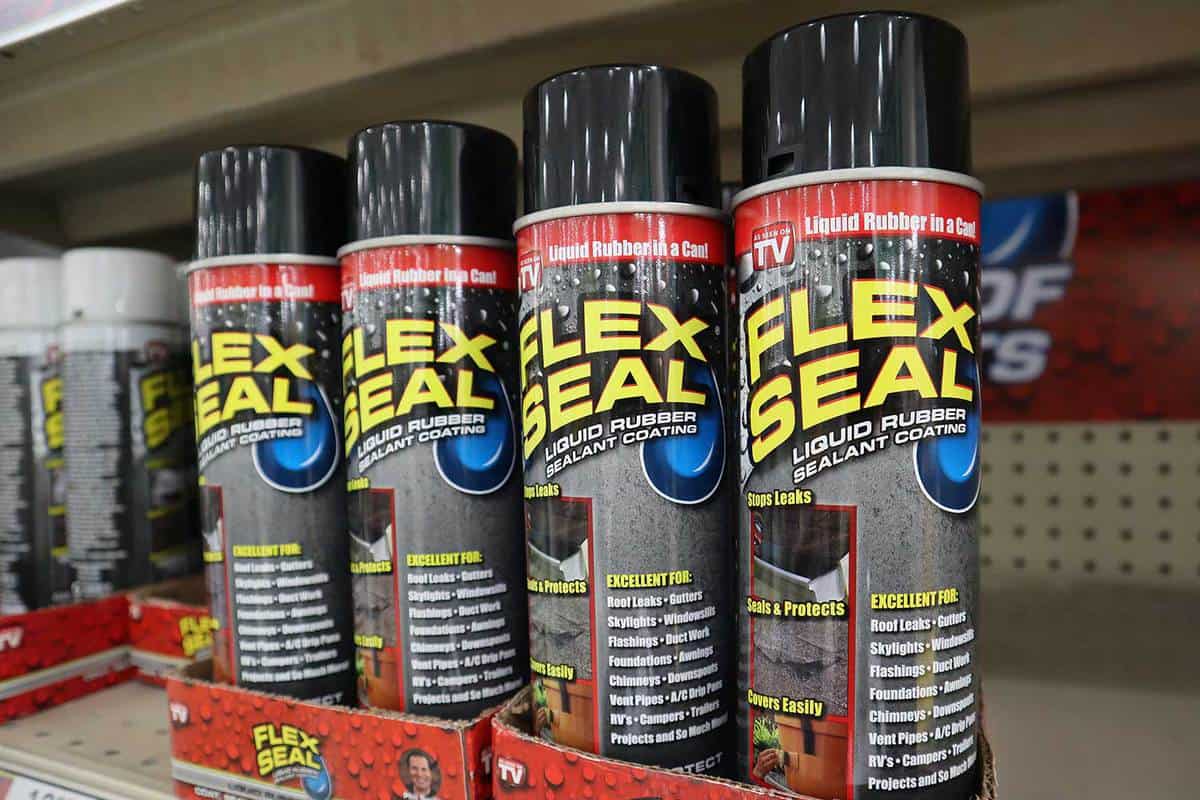
Flex Seal is a thick rubberized liquid product that you can use to repair your RV roof. It can be sprayed, poured, or brushed over the affected portion, depending on the variety that you choose.
Flex Seal effectively works on EPDM and TPO rubber roofs, fiberglass, aluminum, and other roofing materials. This is why it is so convenient to have one stored so that you can easily repair leaks and damages to your roof when they happen. It works fast and will seal your roof from water, air, and moisture.
Once applied, it creates a durable and long-lasting seal on the cracks and gaps so you wouldn't have to worry about a leaking roof for a long time. It can even resist harmful UV rays and can prevent rust and corrosion for those with metal roof parts. However, it should only be used to fix small damages.

Click this link to find this product on Amazon.
How long does a rubber roof last on a RV?
Rubber is quickly becoming a popular choice for RV roofing not only because it is more affordable but also because it is a durable material while still being lightweight. Its expected life expectancy is 20 years although the manufacturers' warranty is usually up to 10 years only. But with proper care and maintenance, RV owners can even get more life out of their rubber roofs.
There are two types of rubber roofs. EPDM or, Ethylene Propylene Diene Monomer, sheds over time; that's why it has white or gray streaks on its sides. This material is very smooth and slippery when wet. TPO or Thermoplastic Polyolefin is glossy and has a bumpy surface but it isn't slippery.
Knowing the type of rubber roof that your RV has will help you determine its proper maintenance. There are certain products that could actually do more harm than good. Cleaners with abrasive and citrus ingredients aren't recommended to use on these rubber roofs. Both types should be caulked every year to reduce the likelihood of leaks.
EPDM Maintenance
EPDM rubber roofs need to be maintained frequently especially when the weather is hot. Use non-petroleum cleaning products. There are also rubber roof coating products specifically made for this material.

Find this EPDM rubber roof coating on Amazon.
TPO Maintenance
TPO rubber roofs must also be cleaned regularly with the use of a mild soap solution and a soft-bristled brush. If repairs are necessary, EternaBond is said to be effective in fixing cracks. This microsealant can last for up to 35 years and requires no further sealing from your end. This makes your job so much simpler and easier.

Click this link to find this product on Amazon.
You should also check your rubber roofs for damages because they can be snagged by tree branches. When this happens, you can patch them up so that the tear would not worsen and cause further issues on your roof.
Final Thoughts
Before planning your annual travel season, make sure that you've resealed the edges and seams around your RV roof so that you won't deal with leaks when you're supposed to be enjoying your time outdoors.
Feel free to visit the following links for some related reading:
How to Effectively Clean Your RV Roof?
4 Types of RV Roofs (And Which One Is Best for You)