Do you need to know how to replace an RV toilet flush valve? Without proper knowledge on replacing an RV toilet flush valve, it is possible to damage your toilet assembly or cause water damage. We have researched this question and have the proper technique to replace your RV toilet flush valve.
To replace an RV toilet flush valve, follow these steps:
- Shut off the water supply valve
- Drain any remaining water from the water supply hose
- Unscrew the toilet's mounting bolts
- Turn the toilet around
- Unscrew flush valve assembly
- Remove old flush valve assembly
- Install new flush valve assembly
- Install toilet back onto mounting bolts
- Reconnect the water supply hose
- Turn on the water supply valve
- Check for leaks
In this article, we will be breaking down each of these steps so that you can follow along and replace your RV toilet flush valve. Additionally, we will discuss the cost and difficulty of replacing a flush valve. We will also cover general information on RV toilet systems and how to keep them working properly. Please keep reading to learn more.
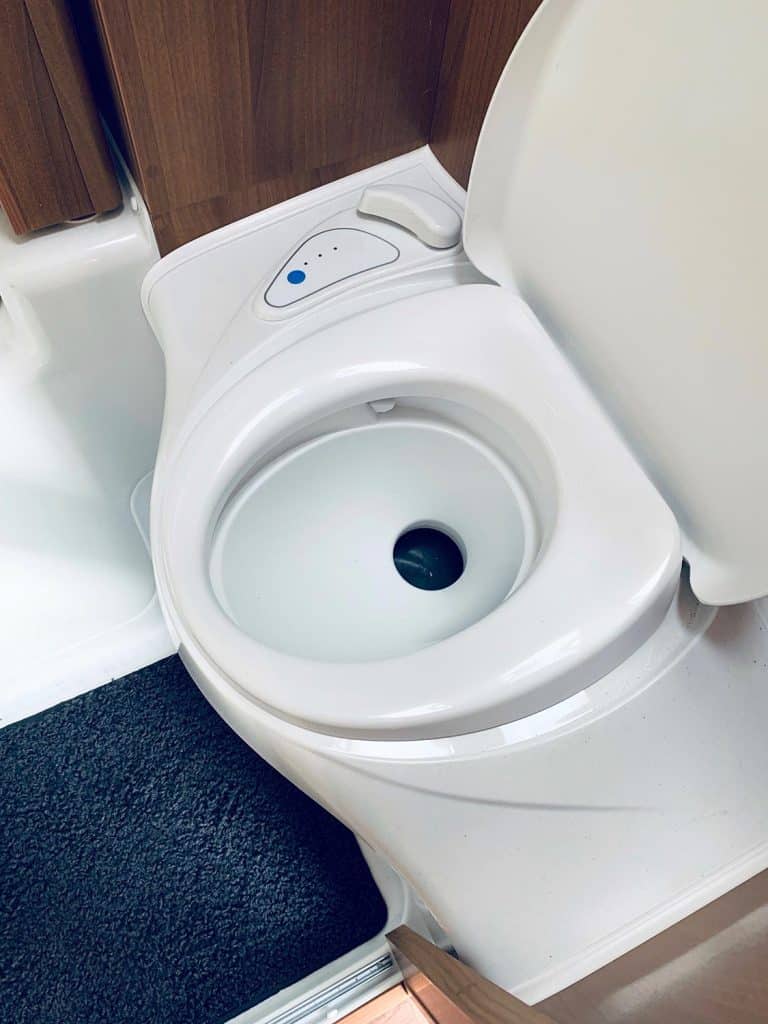
How To Replace An RV Toilet Flush Valve
We will now be going into detail on the various steps to replacing an RV toilet flush valve. If you follow these steps precisely, you too will be about to replace an RV toilet flush valve.
1. Shutting Off The Water Supply Valve
The first step is to turn off the water to the toilet. Find the water supply valve and turn it clockwise until it stops turning. Doing so should securely turn off the water to the toilet.
2. Disconnecting The Water Supply Hose
When you disconnect the water supply hose, it may drain water that is trapped inside. That is why many people like to place a small plastic tub to catch any water in the hose. Once this hose is disconnected, it is time to remove the nuts off of the toilet's mounting bolts.
3. Unscrew Mounting Bolt's Nuts
Nuts screwed onto mounting bolts hold the toilet onto the floor of the RV. You can unscrew these nuts with an adjustable wrench. Once the nuts are off the mounting bolts, there won't be anything left holding the toilet to the floor. It will now be ready to move.
4. Turning The Toilet Around
Now, lift the toilet off of the mounting bolts and turn it around. This will allow you to get to the flush valve assembly. This is much easier than removing the flush valve assembly with it still secured to the ground. Often there won't be enough room between the wall and the toilet to replace the flush valve assembly without turning the toilet.
5. Unscrew Flush Valve Assembly
The flush valve assembly will be held in place by a screw. Before you can remove the flush valve assembly, you will need to remove the screw. Once you remove the screw, you will be able to remove the old flush valve assembly.
6. Remove The Old Flush Valve Assembly
Take the old flush valve assembly and remove it from the toilet. Use a screwdriver to slide it out of position if it gets stuck. There is also a small metal rod on the left of the assembly. Slide this up to unhook it from the toilet. You are now ready to install the new flush valve assembly.
7. Install The New Flush Valve Assembly
Now, take the new flush valve assembly and insert it into the same location as the old one. This should fit snug in position just as the other did. Be sure that the metal rod slides down into the proper position. It can be helpful to take a picture of the old flush valve assembly before removing it to ensure you can place the new one correctly.
8. Install Toilet Back Onto Mounting Bolts
Next, take the toilet and set it back onto the mounting bolts. Be sure that the mounting bolts align well with the holes on the bottom of the toilet.
Tighten the lock nuts onto the mounting bolts until the toilet is flush with the ground. This will indicate that the toilet is correctly secured to the ground. Be sure not to over-tighten the locknuts. Doing so can cause damage to the toilet. The correct tightness will feel snug without straining to tighten the locknuts.
9. Reconnect The Water Supply Hose
Now that the toilet is secure on the ground again, you can reconnect the water supply hose. Be sure to tighten the water hose tightly to prevent any leaks in later steps. You may want to use pliers to be sure to prevent leaks. Make sure not to overtighten the water supply hose. You want it tight enough that it doesn't leak, but not so tight it damages the hose.
10. Turn Back On Water To The Toilet
Once the water supply hose is secured, you can turn on the water to the toilet. Turn the water supply valve counterclockwise until the valve is fully open. Your toilet should now be ready to use. There is still one more step before you can be finished.
11. Checking For Leaks
Before you walk away from this project, it is a good idea to check for leaks. This can happen if any connection isn't entirely waterproof. If there is a leak, be sure to tighten and correct the problem. If there are no leaks, then your job is finished.
This is how to replace an RV toilet flush valve. If you would like to see a video on the technique, RV Living Yet has a great youtube video on the process.
How Much Does It Cost To Replace A Flush Valve?
It doesn't cost much to replace a flush valve. A new flush valve only costs a few dollars online. It is a repair that isn't out of the price range for most people, making only a few excuses for not getting the job finished.
The job can cost a bit more if you hire someone to replace the flush valve for you. Suppose you hire someone; the job could cost between $100 and $150. If you do the job yourself, you could save nearly 80%-90% on labor.
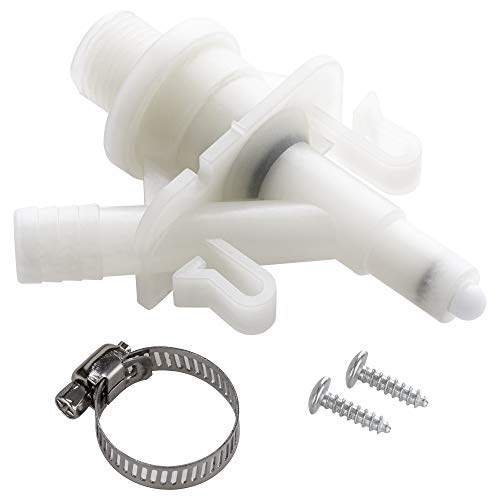
You can find this popular flush valve assembly here on Amazon.
How Hard Is It To Replace A Toilet Flush Valve?
It is not hard to replace a toilet flush valve. While there are a lot of steps to do it properly, not one of the steps is hard. If you need help lifting the toilet, be sure to find someone to help. Don't injure yourself lifting something you aren't comfortable lifting.
It is vital to keep your work area dry and reduce the chances of injury. Also, be sure to keep towels around to soak up any spilled water. If your work area becomes too wet, it could become a tripping hazard.
How Do RV Toilet Systems Work?
How your RV toilet system works depends on which kind of RV toilet you have. Some are like standard toilets with a more secure designated water tank, while other use the fresh water tank to flush the toilet. Either way, the principal idea is to use gravity to help flush down waste while using water to rinse the bowl.
If RV toilets used as much water as their residential counterparts, they would fill the black tank up too quickly, and you would need to stop to empty it often. Using less water prolongs how long you can go before emptying the black tank.
While the setup may vary slightly from RV to RV, the basic idea of the RV toilet is universal.
Should You Keep Water In An RV toilet?
It is a good idea to keep water in an RV toilet. Since an RV toilet won't have as much water pressure as another toilet, they need to keep enough water to keep waste from sticking to the bowl.
It can be imperative that your black tank doesn't become dry. If it does, it may start to release foul-smelling gas throughout the RV. To prevent this, be sure to keep water flushing into the black tank regularly.
Unique Camping Marine's website looks into what could happen if your black tank dries out and how to prevent it. The increased water will also help to cultivate beneficial bacterial for waste decomposition in the black tank.
Can You Flush Toilet Paper In An RV?
Unlike a toilet in your home, you can't just flush toilet paper in an RV. The Toilet paper may get stuck in the pipes and cause a clog between the toilet and the black tank. When you are in an RV, you should place used toilet paper in a receptacle to be emptied once a day as trash.
For some people, this may feel strange but, it is standard practice for RV restrooms. You would do the same thing if you were on a boat, so they are already familiar with the concept for some people.
Final Thoughts
In this article, we learned how to replace an RV toilet flush valve. We also learned about how cheap and easy the replacement is to perform. There is also the matter of toilet paper. We learned that you couldn't flush toilet paper down an RV toilet and instead collect it in a separate receptacle.
We hope you enjoyed this article. If you would like to learn more, check out one of these other posts:
RV Toilet Foot Pedal Repair – What Owners Need To Know
Rv Toilet Keeps Clogging: What to Do? [7 Actionable Methods]