A black water tank for a recreational vehicle (RV) is a common feature of mobile homes. It is vital to ensure its cleanliness and functionality. Wondering if you can use vinegar to flush the black water tank for its maintenance? You are at the right post! We’ve researched everything regarding this matter, and here’s what experts say.
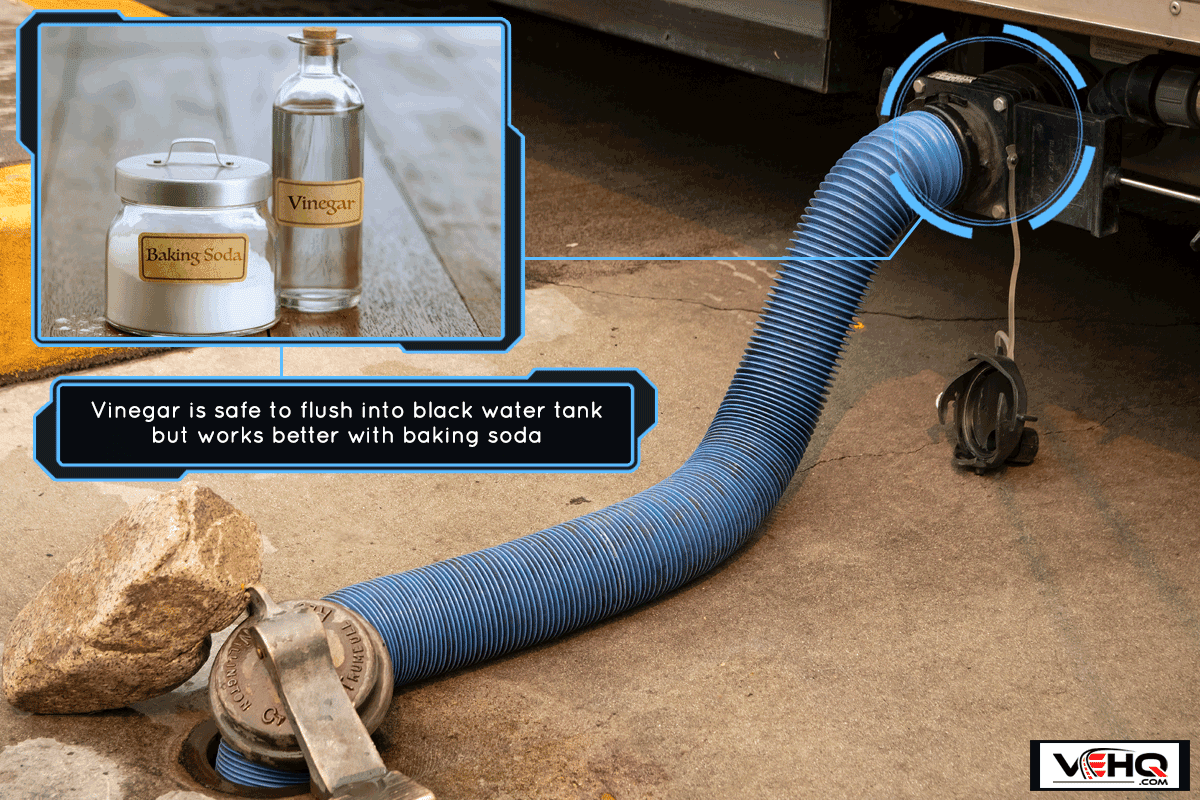
Vinegar is safe to flush into the black water tank, but it works better when you include baking soda. Baking soda is broken down by the acid in vinegar. This releases carbon dioxide gas that can help remove dirt from the surfaces being cleaned. For the best result, flush this mixture with hot water.
In this article, we'll concentrate on the RV black water tank. Also, we’ll share some RV tank treatments and the steps of emptying and cleaning the black water tank. So keep on reading.
What is an RV Black Water Tank?
This tank serves as a sort of repository or holding tank for toilet waste until it is appropriate to dispose of it in a sewer. The RV black water tank's unfavorable reputation stems from this.
This tank contains an electronic sensor that should show the amount of capacity that is accessible on the sensor control panel inside your RV. However, waste debris frequently builds up on those sensors, generating erroneous readings for your black tank.
To ease that problem, you should regularly clean your tanks to remove debris (sludge, calcium, paper, etc.). The tank needs to be emptied once it has accumulated waste from several days or weeks of toilet use.
When you flush in a static stick-and-brick home, you're done. But in a portable toilet, the waste must be flushed and retained until it can be flushed a second time into a sewer.
The majority of RVers don't enjoy the dumping procedure, but since they've grown accustomed to it, they actually don't mind it because they value the freedom to travel with their private restroom. The black water tank in your RV is easy to spot since it is just that—tycpially black.

Click here to see this RV black water tank on Amazon.
Can I Put Vinegar In My Black Water Tank?
To clean and deodorize your black water tank, you need to pour your treatment into your toilet. Definitely, you can use vinegar as it is safe to pour into RV toilets, and it works wonders with baking soda. As you pour the treatment to your toilet, it will do down to your black water tank.
Due to their opposite pH scale, both products (vinegar and baking soda) work well as cleaning agents. According to U.S. standards, vinegar has a pH of 3, while baking soda has a pH of 9.
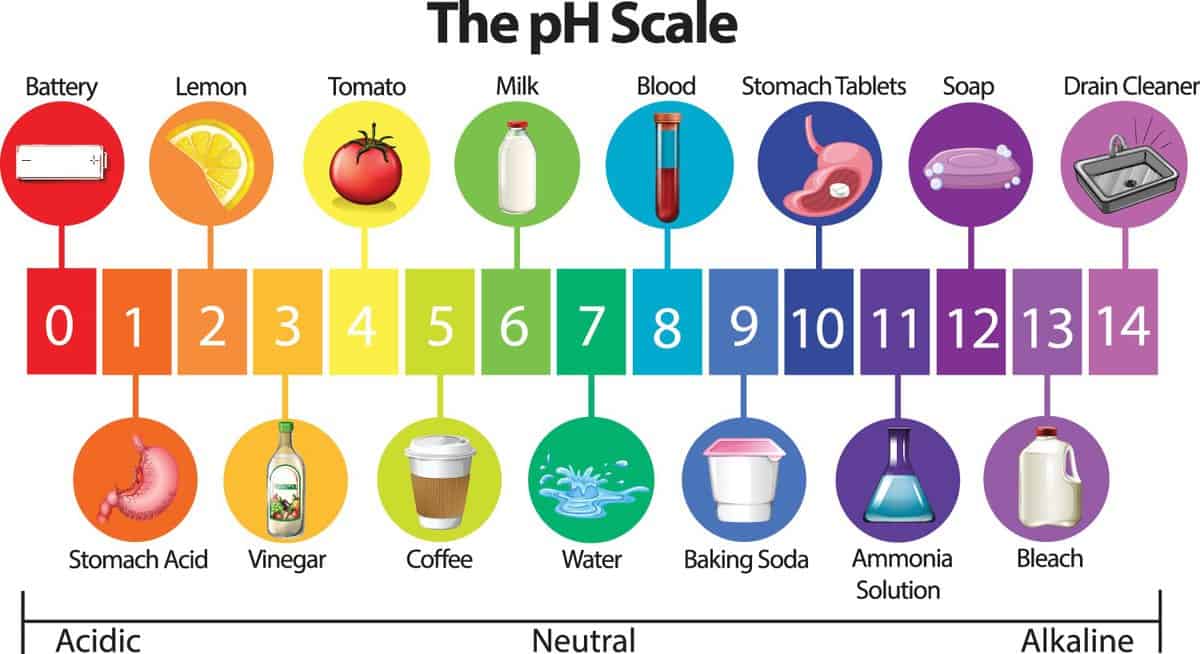
As an acid, vinegar dissolves the minerals that hard tap water produces. While baking soda acts as a base, dissolving organic substances such as dirt, grease, and other sticky icky.
Additionally, each baking soda particle's mineral composition acts as a mild abrasive to clean without leaving behind scratches. They shouldn't combine in exactly equal proportions. You can have two parts of vinegar and one part of the baking soda mixture. Keep the mixture on the neutral value's acidic or basic side to yield amazing effects.
When combined, the acid in the vinegar dissolves the baking soda, creating carbon dioxide gas that can aid in removing grime from the surfaces being cleaned.
However, it's better to mix it with hot water before flushing it into the toilet. According to the study, white vinegar is effective enough to kill Salmonella, E. Coli, and Listeria, but you must raise its temperature to 130 degrees.
What Other Treatment You Can Use For Your Black Water Tank?
You must keep RV holding tank sensors working properly for us to know when tanks need to be emptied and to avoid odors from entering the RV living area. There are other approaches to achieving these ends, and here are some treatments of it:
Geo Method
This treatment reduces the surface tension of water. You simply flush it in the toilet. This guarantees that you won't build the iconic poop pyramid at the tank's bottom. The GEO Method, which is harmless to the environment, also removes scum and stops hard water deposits on the sensors.
For this method, you only need to mix the four gallons of hot water, one cup of Borax powder, and one cup of Calgon water softener thoroughly together in the bucket. Next, pour the full bucket with the mixture into the toilet, then flush.

Click here to see this Borax multi-purpose cleaner on Amazon.

Click here to see this Calgon water softener powder on Amazon.
Dawn Method
Another is the Dawn method, which is equally simple and works similarly to the Geo Method mentioned above. Just pour two capfuls of liquid blue Dawn dish detergent and around half to one cup of Calgon water softener into your toilet. Then, make a thorough flush.

Click here to see this Dawn liquid dish soap on Amazon.
Happy Camper
Happy Camper is one of the most affordable products on the market and also the most effective odor neutralizer. Unlike many chemical deodorant treatments, it eliminates odor without masking it with fragrance.
Additionally, collecting and transporting all of the materials for the Geo or Dawn method proved to be far more difficult than lugging a tub of Happy Camper as it works well too.
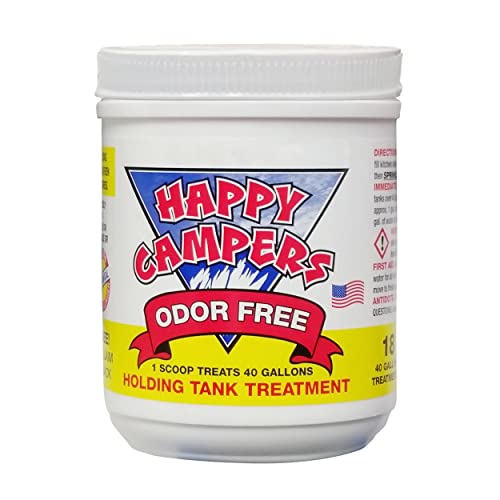
Click here to see this Happy Camper on Amazon.
How To Empty And Flush your RV Black Water Tank?
1. Put On Your Gloves
Put on your disposable gloves before starting work on the days that the RV black tank needs to be maintained and emptied since this job is gross!

Click here to see this box of disposable gloves on Amazon.
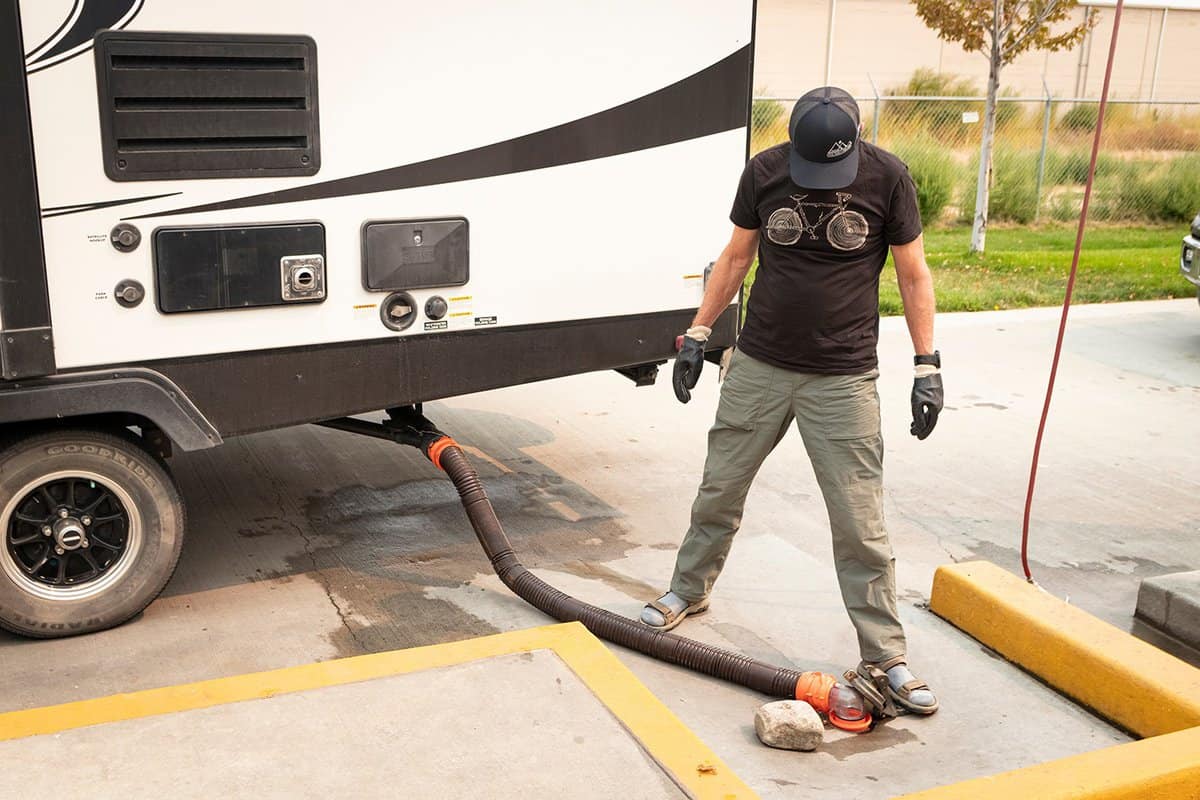
2. Get Your RV Sewer Accessories Ready
Soon after donning your gloves. Get your RV sewer hose, clear sewer hose adapter, sewer elbow fitting, all-purpose water hose, and RV black tank treatment (mentioned above) ready.

Click here to see this sewer hose kit on Amazon.
DO NOT flush your tanks with your drinking water hose! Inform all occupants that using the restroom during this process is not permitted.

Click here to see this drinking water hose on Amazon.
3. Tank Valves
It’s advised that you keep your tank valves closed. If not yet, make sure to close the valve for the black water tank shortly before cleaning.
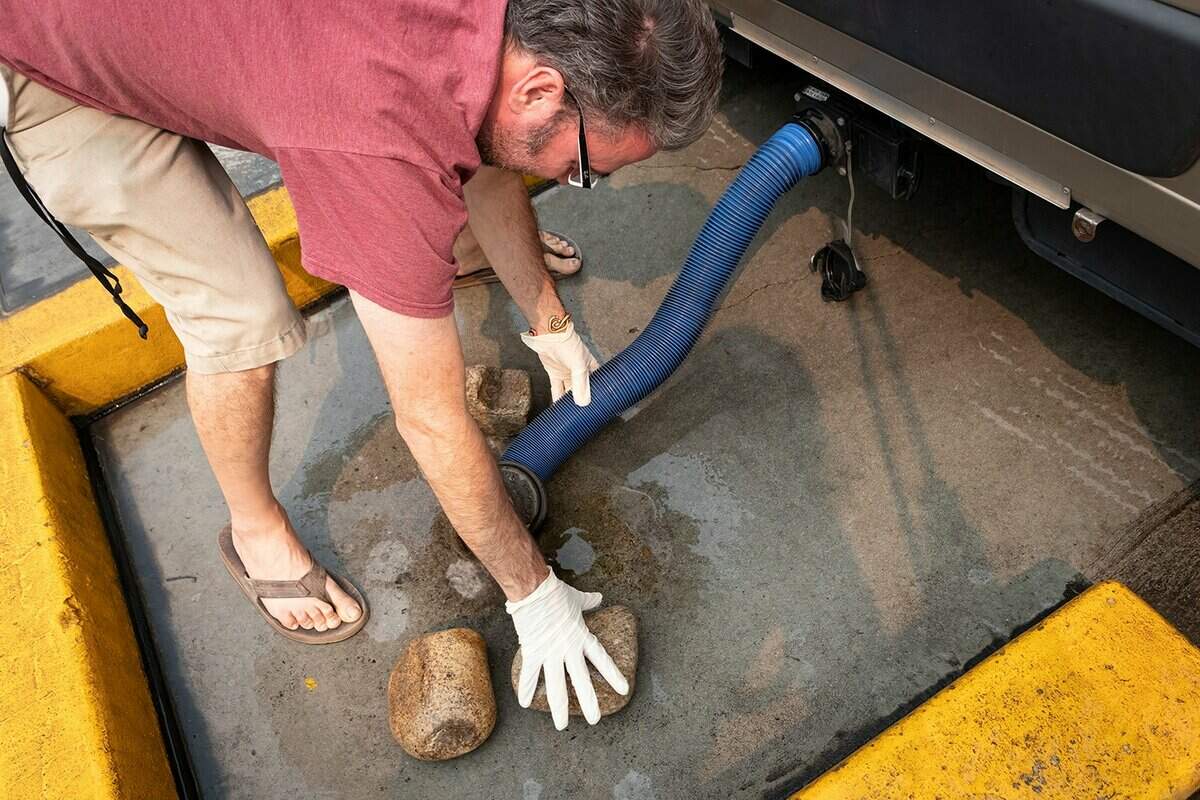
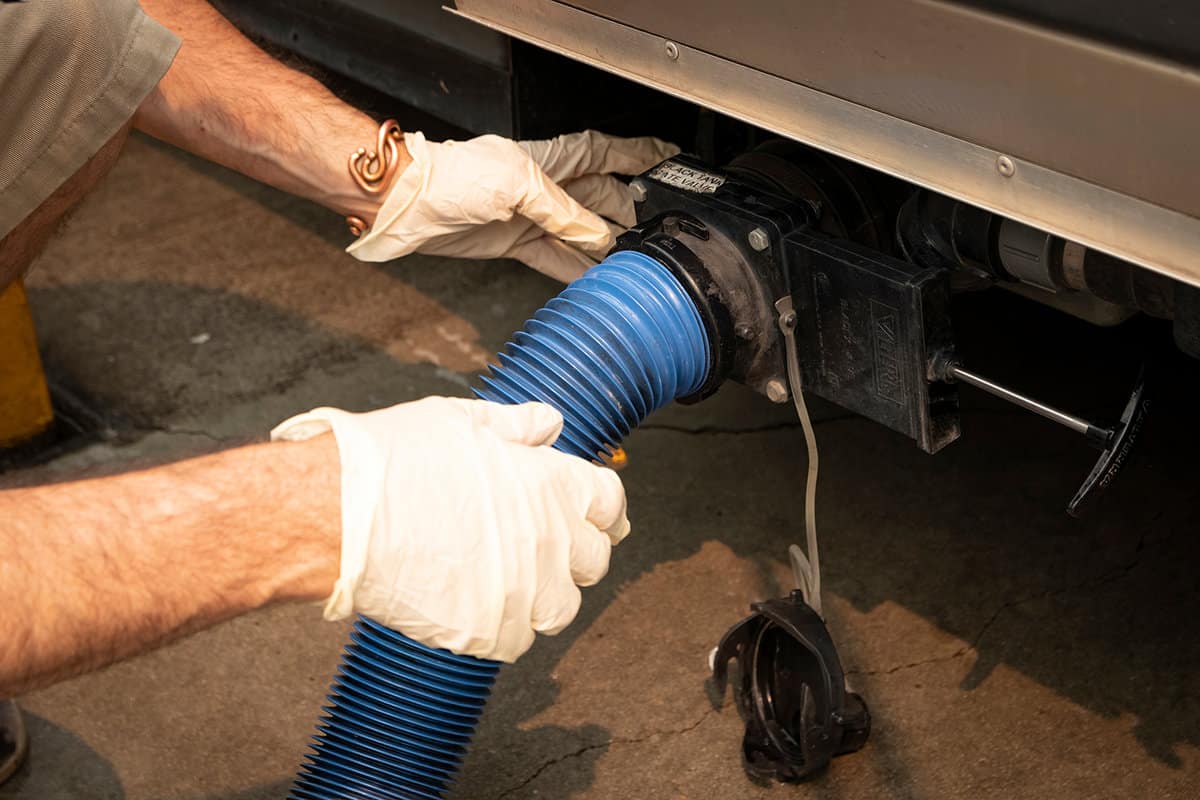
4. Set Up The Sewer Hose And Attachments
On the RV's sewer discharge port, remove the sewer pipe lid. One end of the sewer hose should be connected to your clear sewer hose adapter or Clearview adapter. After that, connect it to the RV's sewer discharge port.

Click here to see this Clearview adapter on Amazon.
5. Connect Your Hose
Insert the sewer hose's other end into the ground's sewer hole after attaching an RV clear elbow fitting to it. Make sure it is secure. If it isn't stable, set something heavy on top to keep it in the hole.

Click here to see this RV sewer hose elbow with adapter on Amazon.
6. Open The Black Tank Valve And Let It All Out!
Open the valve on the black tank first to fully discharge the contents.
7. Hook Up Water
Connect the all-purpose water hose to the black tank flush port and water spigot. Turn on the water at the spigot to flush the black tank until the clear sewer hose adapter is filled with water.
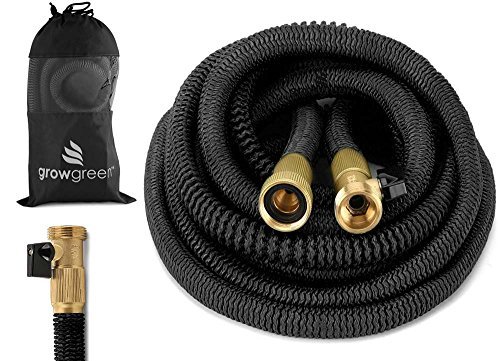
Click here to see this water hose on Amazon.
8. Turn off The Water
Turn off the water at the spigot. Then, close the black tank valve.
9. Disconnect Sewer Hoses And Attachments
Disconnecting the clear sewer hose adapter and sewer hose elbow attachments after the water is entirely drained and the sewage hose is empty. Stack the sewer hose and any add-ons. Put the cap back on the RV's sewer output port.
10. Clean Toilet And Add Treatments
Enter the house and fill the toilet bowl with one gallon of clean water. Afterward, flush, and it will move down into the black tank. Clean the toilet bowl with a toilet brush after adding a second gallon of water and a toilet cleaning solution. To prevent piling, add an RV holding tank treatment and flush it into the black tank.
11. Back Flush Method
If you live in an RV full-time, you should perform the back flush procedure at least once per month. However, if you just camp sometimes or on the weekends, you should back flush at least every quarter or twice a year.
You should close all valves and fill your black tank with water after the initial rinse and dump. Then, follow steps 6 to 7 again. To clean your RV's black tank, use as much water as you can. The outcome should be pure water that flushes out of your tanks.
Some RVs come with a back-flush system already installed. You may easily add aftermarket systems if your vehicle doesn't come with a factory-installed back-flush system.
A video demonstration of emptying and flushing out the dirty contents from the RV black water tank is shown on YouTube below.
Final Thoughts
Once you become familiar with the procedure, taking care of the black water tank isn't difficult. Bloopers involving black water tanks do occur, but they're not as severe as you may expect.
Remember, there are many treatments you can try for your black water tank, such as vinegar and baking soda mixture, Happy Camper, Geo, and Dawn methods. If you are planning to use one of these treatments, you can refer to the guidelines mentioned above.
We sincerely hope that this post flushed out any confusion you may have had regarding the RV black water tank. For more interesting topics, check out some of our posts below.
RV Door Not Closing – What To Do?
RV Water Heater Isn’t Working On Electric Or Gas – What To Do?