When you've set your mind on camping, you might choose to use an RV as your vehicle of choice. This way, you use the bathroom with the comfort of knowing you don't have to wait for anybody else. However, it also comes with responsibility. You'll have to ensure you take care of all the components: like the toilet seal. If you're wondering how to lubricate an RV toilet seal, let's find out!
There are two ways to lubricate a toilet seal. The first way uses Vaseline and a toothbrush. You will take some of the Vaseline and spread it all over the seal. If you don't want to put your hands anywhere near the toilet, you can look into the market for RV seal lubricants. In general, all you'll have to do is pour the lubricant on the seal and wait a few hours.
If you're new to this experience, you might want to know about what goes on when you lubricate the seal. Why would the seal need lubricant in the first place? Additionally, you might want to know what happens if lubricating the seal doesn't work. There are still more details that we have to cover. If you'd like to know this and more, please keep reading ahead.
Lubricating an RV Toilet Seal
Lubricating the toilet seal is as simple as it sounds. All you'll need is a few tools. In some cases, you won't need tools at all. The first way to about it is by using Vaseline to lubricate the seal.
It's accessible and readily available if you need to lubricate the seal right away. You can get a pair of gloves and spread the Vaseline straight on the seal. However, if you're not too fond of messing with the toilet by hand, you can also use a toothbrush.
Alternatively, you can also go to a plumbing store and purchase silicone grease. Without further ado, let's get to applying the grease onto the seal:
- First, turn the water off for the RV.
- Once you've turned it off, drain the toilet from any remaining water. This way, it won't get in your way when you try to apply the grease.
- As soon as it's drained, you can scoop a bit of vaseline/grease.
- Push on the handle of the toilet to fully expose the seal.
- Then, apply a coating of grease all around it.
- Make sure you cover all the areas. Meaning, apply a nice coat to the inside and underneath.
That's it! It sounds too easy to be true. But, it always sounds easy in writing. So, we'll include a YouTube video to show you how it's done:
RV Seal Lubricant
If you can afford to wait a bit, you won't need to do any hands-on work on the seal. Instead, you can go online to buy an RV toilet seal lubricant. Manufacturers such as Thetford make these. The job is much simpler than the first method.
Still, it will depend on the brand the instructions of the brand you purchase. In the case of Thetford, they instruct users to dump one-quarter of the lubricant bottle into the toilet. Let it sit in there for about 8 hours.
During this timeframe, refrain from flushing or using the toilet. After 8 hours, anyone is free to use it. Again, it sounds simple. If you can't take our word for it, here's a video from Thetford demonstrating how to apply it:
Choose whichever method you like. The first way will take a bit of work. And, you'll have to mess with the inside of the toilet with your own hands. So, choose wisely!
Can I Use Vaseline on an RV Toilet Seal?
As we mentioned, Vaseline is a good substitute if you don't have access to a seal lubricant. However, it isn't a permanent substitute for the lubricants you can purchase in the market. The reason is that Vaseline is not made for the specific use of coating/lubricating RV toilet seals.
As you can guess, the statement above implies that Vaseline won't work for the long term. Some forum users suggest that success in applying Vaseline to the seal will vary. For some of them, it didn't work at all. One even called the Thetford service department - who recommended against using it.
Others recommend it if you need a readily available lubricator. Regardless, you'll know to purchase a commercial lubricator once you've applied the Vaseline to the seal. Is the toilet holding water? If water is leaking and the toilet's becoming dry, then the Vaseline coating didn't work.
In that case, go for any brand of RV toilet seal lubricator.
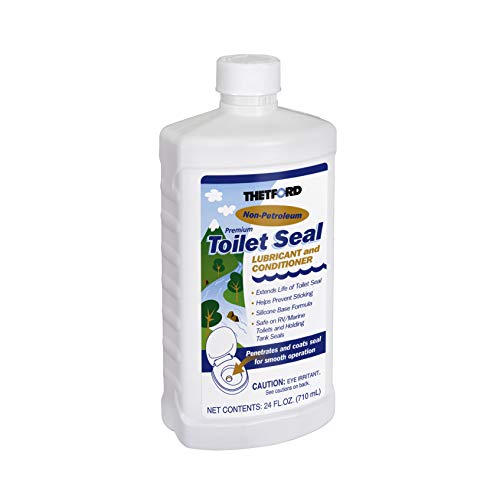
Click here to see this lubricator on Amazon.
How Long Should an RV Toilet Seal Last?
If it's your first time lubricating an RV toilet seal, it might be causing more concerns. Like, how long should an RV toilet seal last? Some suggest it will last a good while.
The answer might not be specific enough for you. So, we'll have to compare a wax seal lifespan to the rubber one found in your RV. In homes, the toilets will use a wax seal. Those types of seals will last around 20-30 years.
Some claim that they should be able to last as long as the lifespan of a toilet. Thus, we can assume the same can be true for a rubber seal in an RV toilet. It still begs the question, what happens if the toilet seal doesn't last as long as the toilet? Can they be replaced?
Can You Replace the Seal on a Camper Toilet?
If lubricating the seal doesn't work, then it's time to replace the seal itself. So, yes, you can switch out the seal in a camper toilet. But, what are the signs that you'll need a new one? A toilet that can't hold water is one of the more obvious signs, but what are the others? Additionally, how can we replace them?
The first marker of a toilet seal gone awry is its inability to hold water. If you don't know why that's a problem, it's because holding a bit of water in the toilet bowl creates an airtight barrier between the toilet and the black water tank. Once it no longer holds water, it indicates that the seal is dry.
From here, you might also notice a lingering odor coming from the toilet. All of these signs indicate that you need to replace the seal. Replacing the seal isn't as hard as it sounds. Let's take a look at how to do it.

Click here to see this RV toilet seal on Amazon.
Preparing to Replace the Seal
- The first thing you want to do is clean the toilet. This way, you won't run into anything nasty while replacing the seal.
- Next, purchase a seal. However, it's important to note that you will need to look for one that fits your toilet. You'll have to make sure to get one of your RV make and model.
- You'll be working with the insides. So, turn off the water pump and other outside water sources.
- Disconnect the water supply to the toilet.
- Drain the toilet of any remaining water. Take a rag and dry the inside entirely.
- Again, you're going to be working with some gnarly materials. Wear a pair of gloves in case you've missed removing some waste debris. You may also want to wear a mask for added protection.
- Before beginning the replacement, you should also empty your black water tank. It's a necessary step to avoid having to retrieve tools covered in waste should they fall into the tank.
Replacing the Seal
- Remove the bolts holding the toilet to the floor. The number of bolts varies according to the size of the toilet.
- Lift the toilet and set it aside.
- Lift the cover. You're free to remove the seal. If it has a bit of a tug, you can carefully loosen it with a screwdriver.
- Scrub the part that holds the seal. You may also clean the area surrounding it.
- Take your new seal and place it in the flange. Use plumbers sealant to help it sit easily. Let the seal dry.
- You should be all set. Retrace your steps to place everything back together.
Does an RV Toilet Have a Wax Seal?
If you're wondering what type of seal you should purchase, you might run into the wax variation. It's commonly found in-home toilets. However, RV toilets will usually have rubber seals. As some suggest, wax seals don't work too well in RVs.
The reason is that the wax seal could loosen during the summer months. You could fix this problem by tightening the bolts. But, the seal will begin to become thinner after repeatedly doing this.
Final Takeaway
Maintaining some parts of the toilet will always beat having to go out in the woods to do your business. As we can see with the toilet seal, it isn't too difficult of a job. Once it's you finish it, you can go back to using the toilet as you please! We hope you found the information above helpful!
Before you go, do you have other RV toilet concerns? Are you looking to replace the one you own currently? If you're wondering how big RV toilets can get, check out our post here: How Big Is An RV Toilet? How Much Weight Can They Support?
Need to replace another component of the toilet? If it's the toilet seat, you might be wondering if you can use a regular one. If you'd like to learn more, check out our post here: Can You Put A Regular Toilet Seat On An RV Toilet? Safe travels!