The last thing you want is a leaky RV window. Waking up to a puddle of water or spending extra fuel on air conditioning dampens any family vacation. Even the tiniest of leaks cause problems, so you need to fix them as soon as possible. Lucky for you, we have done the research to show you how to seal those pesky little leaks in RV windows.
It is important to take care of the window leak as soon as you discover it in your RV. Follow these simple steps to fix any window leak:
- Determine the location of the leak.
- Isolate the leak for the present time.
- Clean the window area.
- Prepare the area.
- Apply the correct sealant.
- Let the sealant dry.
If your window is still leaking after you apply a store-bought sealant, then you may need to replace the whole seal or the window itself. But, if you catch your leak early enough, these simple steps should be all you need to have a properly sealed window.
You probably have more questions about each of these steps. Keep reading to find out more details about how to seal your RV window by yourself, and more!
Why Is My RV Window Leaking?
Before we delve into how to fix a leaky window, let's take a look at why your window is leaking in the first place. Window leaks are bound to happen with time. A leaky RV window doesn't mean you are a bad RV owner, especially if you know what to do!
Window leaks are typically caused by improper installation or worn out parts. Either way, it is very important to fix a leak as soon as you notice it. Left untreated, a leaky window leads to mildew and mold growth, structural damage, and general discomfort to passengers.
For more information about the RV water damage, check out: "How to Deal With RV Water Damage." It will make you think twice about leaving a leaking window untreated.
How To Seal A Leaky RV Window Yourself
Repairing an RV window leak is easier than you may think. With a few tools and the right supplies, you can do it on your own. You most likely will save time and money by avoiding an unnecessary trip to the mechanic. Let's take it step by step, so you know exactly what to do.
1.Determine The Location Of The Leak
First, you need to find the exact point where the sealant is malfunctioning. Sometimes a leak is so small it is hard to locate the precise location. Carefully inspect all seams until you find the source.
Remember, a small trickle of water from a window corner doesn't always mean you have a leak. You may think your window is broken when water is actually accumulating due to condensation. Make sure to rule this out before you move onto the next steps. You don't want to tear up your sealant if there is no leak.
2. Isolate The Leak
It is imperative to isolate the leak as soon as you locate it. This is especially important if it is currently raining when you find the leak.
To secure the leak, you need waterproof tape and a large piece of plastic like a garbage bag. First, go outside and try to dry off the window. Then, cover the leaking window with plastic and tape it down. Make sure to press the tape down firmly to create a waterproof seal.
Gorilla Weather Tape
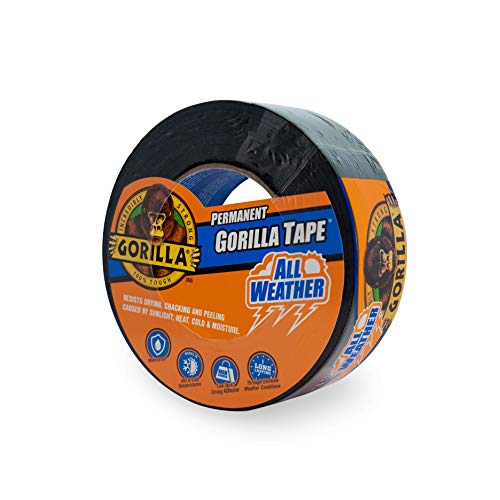
This all-weather tape is perfect for assisting in window leak repair. It stands up to harsh conditions, so you can isolate the leak during inclement weather. Click here to view Gorilla Tape on Amazon.
3. Clean The Window Area
Next, you need to clean the window well. This is a very important step because you don't want to seal over dirt and grime. Doing so makes the new seal less effective.
Use diluted dish soap and a cleaning brush to scrub the window well. You can also use canned air to get even more dirt and grime out of the seams. Once you have scrubbed all the dirt away, rinse with clean water. Then, use a towel or let the window air dry before you move to the next step.
Even if you know exactly where the leak is, it is still a good idea to thoroughly clean the entire window. Getting rid of build-up is a part of proper RV maintenance.
Runloon Window Cleaning Kit

Here is a great set of brushes for cleaning windows. With these specially designed pieces, you are sure to reach even the trickiest of places. Click here to view this kit on Amazon.
4. Prepare The Area
Now it's time to get your window ready for the next steps. First, move everything near the window out of the way. You want plenty of space. Your window should be nice and clean, so you can clearly see where the leak is coming from.
If the leak is small, you need to fill it in with a proper sealant. First, tape off all areas besides where you are working. This helps you maintain a more professional look upon completion. There won't be caulk or other sealants where you don't want it.
Next, use a razor blade to scrape up the old caulk. Now you will have an unsealed area to work with. If the leak is large or you find multiple leaks, you may consider replacing the entire seal instead of caulking over every leak. But, if there is window damage, then you may want to consider replacing the entire window. Check out "How Much Does It Cost To Replace RV Windows" for more information.
Below is a great video to show you how to replace the entire seal on RV windows.
5. Apply The Correct Sealant
Now that you have the leak isolated and cleared of the old sealant, your window is ready for a new sealant. Make sure you are using the right caulk for the surface you are working with. Most likely, you want to use a universal sealant that adheres to multiple surfaces, especially glass.
Follow the directions on whatever sealant you buy as you gently fill in the affected area to patch your window leak. Most likely, you will need a caulking gun. Make sure to buy one of those if you don't already have one to make your job significantly easier.
To ensure a proper seal, put some petroleum jelly on your finger to prevent sticking. Then, run your finger along the fresh caulk to push it further into the groove. This extra step ensures a tighter seal.
Geocel Pro Flex Sealant

This white caulking sealant is a flexible, crack-resistant product to patch up all of your window leaks. It is UV-resistant and easy to apply. Click here to view caulk on Amazon.
Newborn Pro Caulk Gun

Here is a durable caulk gun that will last you years. Use it with any universal caulk for all of your maintenance needs. Click here to view the caulk gun on Amazon.
6. Let The Sealant Dry
It is very important to allow the sealant to dry properly. Leave it undisturbed for at least 24 hours. This includes leaving the plastic covering on the outside of your window in case it rains.
After at least one day, remove all the tape from the inside and outside. Then, your leak should be fixed. However, if you find that water is still dripping into your RV, you may want to try caulking it again or replace the entire seal. If so, watch the video above for assistance.
Related Questions
Below are some common questions related to RV seals. Keep reading to learn helpful tips for your DIY sealing job.
Can You Use Flex Seal On RV Windows?
Yes, you can use Flex Seal on RV windows. This liquid rubber comes in a sprayable or paste form. It is meant to stop leaks quickly and is great for RV windows, especially skylights. If you want to try Flex Seal, we recommend using the caulk form, not the sprayable can.
Flex Seal Adhesive

This waterproof caulk is great for fixing RV window leaks. Click here to view Flex Seal on Amazon.
What Kind Of Caulk Do You Use On A Camper Window?
You should use a multi-purpose caulk on your camper window. Look for caulks that adhere to multiple surfaces and dry clear. Acrylic latex is a great choice. This caulk dries fast and can be painted over. So, it is perfect if you want to fix leaks from the outside.
Pure silicone is also good. This caulk is extremely strong when applied to the correct surface. However, it doesn't work on porous materials, like wood. So, make sure it will stick to the affected area before you opt for silicone caulk.
How Do You Seal RV Windows For Winter?
You can get creative when it comes to sealing your RV windows for winter. There are a variety of methods you can use. They include:
- Window insulation film
- Bubble wrap
- Vinyl covering
- Plexiglass
- Weatherstripping
- Thermal lined drapes
All of these methods keep the cold out and the warmth in. Their effectiveness and prices vary greatly. And some are more aesthetically pleasing than others. It is up to you to find the best method for your RV.
How Do You Reseal A Frameless RV Window?
Resealing a frameless window may seem more complicated, but it is not. Simply remove the window and frame. Then, clean the interior of the window and scrape off the old seal from the frame. Next, apply the new seal to the frame. Lastly, reinstall the window and properly seal it.
Watch this video to see how to do it for yourself:
Stop Your RV Window Leaks Now!
Never let a window leak go untreated! Even small drops of water lead to mold and water damage over time. Fixing leaks is a simple process anyone can do. All you need is some motivation, the correct tools, and a little bit of time. So, now all you have to do is follow the above steps to fix your RV so your window doesn't leak a second longer.
Sealing RV windows to stop leaks is a vital thing to do, and I am glad you’ve mentioned here how I can do it. This is perfect content for me, and I will share it with my colleagues now.
RVs are fantastic because they allow you to travel while maintaining the comforts of home. Constant use, however, will surely lead to problems, and one of the most typical problems with RVs is leaking windows. This is why it’s critical to properly seal your RV windows, since leaks can lead to mold and other concerns that are not only unsightly but also dangerous to your health.